

Have you ever wondered how React makes it possible to navigate through pages in an application without the entire page reloading?. Not to worry, in this article, we will go through step by step and explain what makes that possible.
Pre-requisite
Before going further in this article, you need to be familiar with React, Node, and npm, a package manager for javascript.
Overview
This article covers a few sections, First, we’ll set up React and React Router using npm. then we will Define a few concepts, after that, we will build a basic navigation routing. Also, the article covers React Router v5
Visit here sitepoint to read more on React Routing.
The entire code for the project is available on this Github repo
Let's get started.
First, create a react project using the following:
npx create-react-app react-router-demo
When the whole process is finished, change into the react-router-demo folder:
cd react-router-demo
Wait, before getting deeper, Let first define some concepts, for you to understand them better.
React-router - This is a react library that handles page routing declaratively, this means you get to decide how your data will flow in your application. This is the core package.
The react library also comprises of other two, which are environment based:
React-router-dom - This is for a web-based environment. And,
React-router-native - For mobile-based environment.
For this article, we will focus on react-router-dom since we are building on the web.
Let's continue, now install react-router-dom using npm like so:
npm install react-router-dom
Then, start the development server like so:
npm run start
At this point your dev server is up, now let's do a basic React Router setup.
Before we do that, first let's clean the react app template so that we can implement our own code.
head on to the src folder, delete App.test.js, index CSS, logo,reportWebVitals.js, and setupTests.js. Then clean the app.css and in the app.js clean everything inside the div.
This is what the components should look like:
// app.js

function App() {
  return (
    <div className="App">
    <h1>React-router-dom</h1> // this is for testing if  the app is still working.
    </div>
  );
}

export default App;
// index.js
import React from 'react';
import ReactDOM from 'react-dom';
import App from './App';

ReactDOM.render(
  <React.StrictMode>
    <App />
  </React.StrictMode>,
  document.getElementById('root')
);
App.css should be empty. if you have done the process correctly, the browser will be showing something like this.

Fantastic, now, go to the index.js and wrap the component with the BrowserRouter component. the BrowserRouter component is a type of router from React Router API, that keeps your UI in sync with the URL.
After you have wrapped it, you need to import it from the React Router API like so for it to work:
import React from 'react';
import ReactDOM from 'react-dom';
import App from './App';
import {BrowserRouter} from 'react-router-dom'

ReactDOM.render(
  <BrowserRouter>
    <App />
  </BrowserRouter>,
  document.getElementById('root')
);
Next, let's talk about Link, Route, and the Switch components.
- Link components - it's used to navigate between pages, it's usually used instead of HTML anchor tag. unlike HTML anchor element, we can use to navigate to a particular URL and have the view re-rendered without a refresh.
Example in code:
         <li>
            <Link to="/">Home</Link> // this links to home component
          </li>
Route - The Route component, on the other hand, renders some UI if the current location matches the route’s path.
Example in code;
<Route path="/"><Home /></Route> // this matches with the above location
- Switch - with this component, only the first child Route that matches the location gets rendered.
For example, let's say the match is /about component all the routes that match the location will tend to be rendered with it. that's where the switch components come in "for the rescue hahaha".
//This example was copied from https://www.sitepoint.com/react-router-complete-guide/

<Switch>
  <Route exact path="/"><Home /></Route>
  <Route path="/About"><Category /></Route>
  <Route path="/products"><Products /></Route>
  <Route path="/:id">
    <p>This text will render for any route other than those defined above</p>
  </Route>
</Switch>


// The: id part of the path is used for dynamic routing. It will match anything after the slash and make this value available in the component
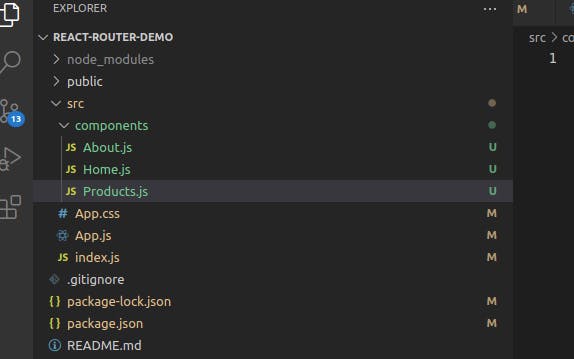
Now that you understand everything you need to make our Project work. Create a folder in the src folder and name it a component, then in the component folder create Home, About, and Products files, it should look like the following.
Now, copy the following code to the files created respectively.
export const Home = () => (
    <div>
      <h2>Home items should be displayed here</h2>
    </div>
  );

export const About = () => (
    <div>
      <h2>About items should be displayed here</h2>
    </div>
  );

export const Products = () => (
    <div>
      <h2>Products items should be displayed here</h2>
    </div>
  );
Then head to the app.js, import the files and also add the code as follows :
import { About } from "./components/About";
import { Home } from "./components/Home";
import { Products } from "./components/Products";
import { Link, Route } from "react-router-dom";
function App() {
  return (
    <div className="App">
      <nav className="nav-bar">
        <ul className="nav">
          <li>
            <Link exact to="/">
              Home
            </Link>
          </li>
          <li>
            <Link to="/about">About</Link>
          </li>
          <li>
            <Link to="/products">Products</Link>
          </li>
        </ul>
      </nav>

      <Switch>
      <Route path="/">
        <Home />
      </Route>
      <Route path="/about">
        <About />
      </Route>
      <Route path="/products">
        <Products />
      </Route>
     </Switch>
    </div>
  );
}

export default App;
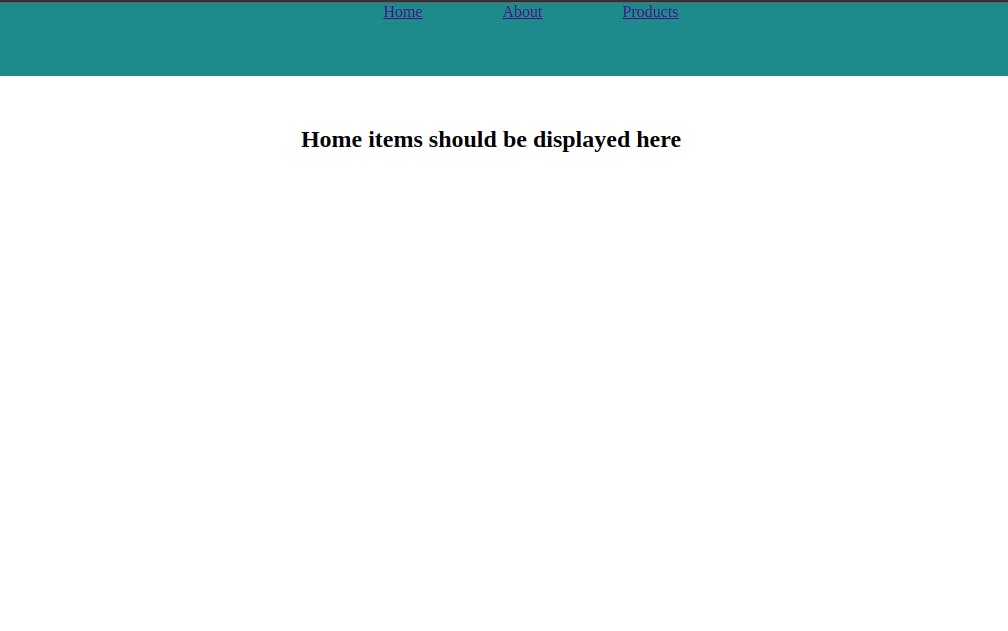
Also added styling to the above code on the app.css.
* {
    box-sizing: border-box;
    padding: 0;
    margin: 0;
  }
  .nav-bar {
    min-height: 10vh;
    background-color: darkcyan;
  }
  .nav {
    display: flex;
    justify-content: center;
    align-items: center;
  }

  .nav li {
    list-style: none;
    margin-left: 80px;
  }
  h2{
    text-align: center;
    padding-top: 50px;
  }
If you did it correctly, you are now able to switch between pages. the view should look something like this: